The upcoming Path of Exile 3.25 patch, known as the Settlers of Kalguur expansion, will introduce a new set of challenges alongside new rewards for players to tackle. With this Path of Exile 3.25 Settlers of Kalguur Challenge Guide, we will not only list all challenge rewards available but also guide you to unlock them more easily!
PoE 3.25 Challenge Guide - Settlers of Kalguur Challenge Rewards & Complete Tips
In this exciting new expansion, you have the opportunity to earn a set of exclusive Settler themed microtransactions by completing up to 40 new challenges. These challenges are designed to test your skills and dedication, rewarding you with unique items that enhance your in-game experience. Here is everything you should know about the PoE 3.25 challenge rewards and how to complete each challenge!
POE 3.25 Challenge Rewards
Here's a sneak peek at what rewards you can earn by completing Settlers of Kalguur Challengs:
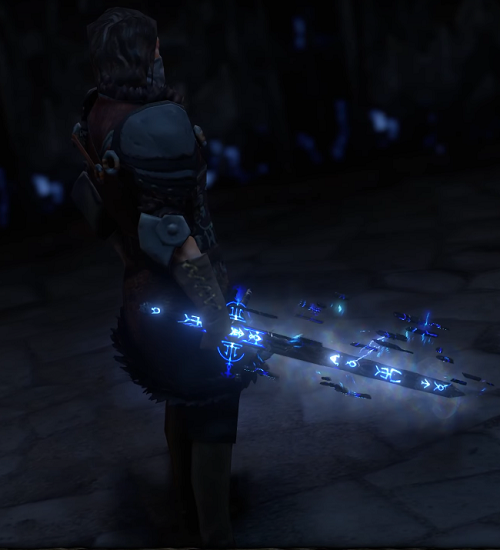
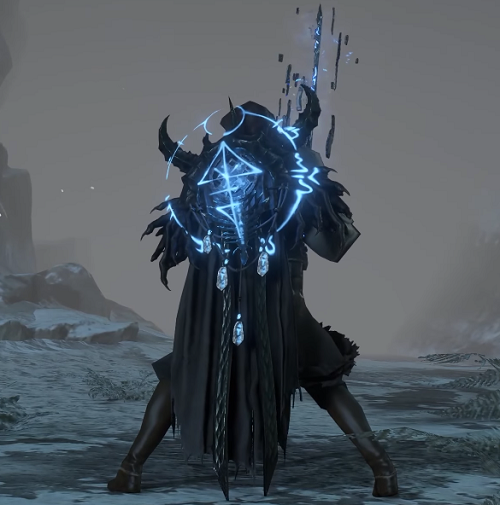
12 Challenges: Runebind Weapon Effect
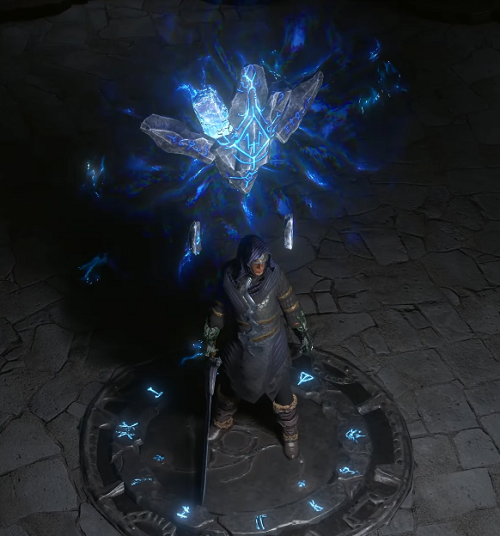
24 Challenges: Rune Character Effect
32 Challenges: Kalguuran Cloak
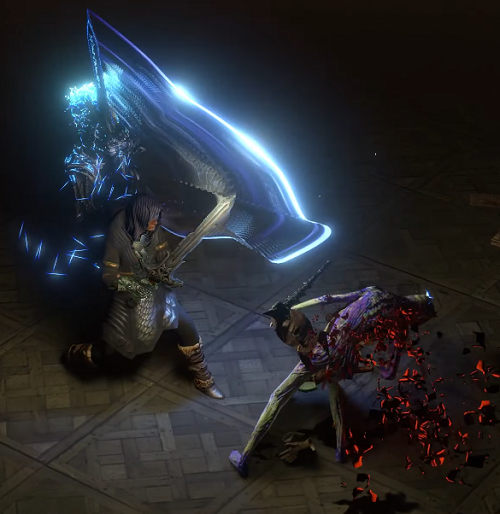
34 Challenges: Verisium Knight Unique Finisher Effect
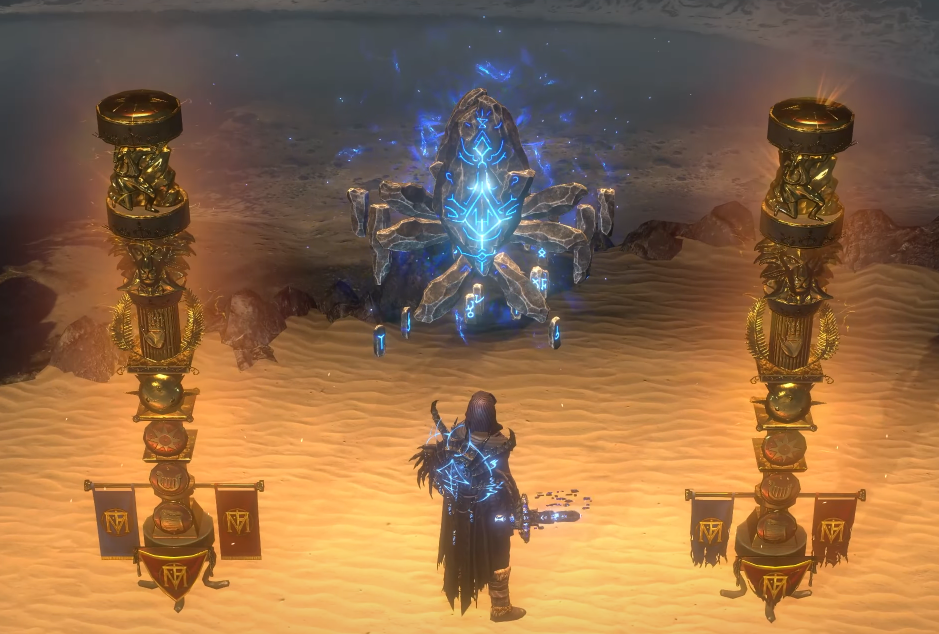
36 Challenges: Kingsmarch Portal
19-40 Challenges: Settlers Challenger Trophy
But that's not all! Completing these challenges will also grant you pieces of the Settlers Totem Pole Hideout Decoration, a prestigious addition to your hideout that showcases your accomplishments.
PoE 3.25 Ruthless Challenge Rewards
For those venturing into Ruthless mode, the rewards come even faster, with microtransactions awarded at 2, 4, 6, 7, and 8 challenges completed.
2 Ruthless Challenges: Runebind Weapon Effect
4 Challenges: Rune Character Effect
6 Challenges: Kalguuran Cloak
7 Challenges: Verisium Knight Unique Finisher Effect
8 Challenges: Kingsmarch Portal
1-8 Ruthless Challengs: Ruthless Settlers Challengers Trophy
How to Unlock Settlers of Kalguur Challenge Rewards?
To claim these rewards:
Open the Challenges screen within the game (default key: H).
Complete the unique challenges for the Necropolis league.
Rewards unlock sequentially at 4, 8, 12, and 16 challenges completed.
Further upgrades and unique interactions become available as you progress.
PoE 3.25 Settlers of Kalguur Challenges
In the Settlers of Kalguur League, you will face 40 new challenges, with an additional 8 available in Ruthless mode. Completing these challenges will earn you unique microtransaction rewards exclusive to this league:
1. Beginner's Basics (Very Easy)
Complete each of the following tasks:
Equip a magic flask
Flask Acquisition: Flasks drop from monsters and can be purchased from female NPCs in town, such as Nessa in Act 1. They are also rewarded from the "Mercy Mission" quest in Act 1.
Upgrading Flasks: Flasks usually drop as common (white) items. Use an Orb of Transmutation to upgrade a common flask to a magic (blue) flask, adding 1-2 modifiers.
Useful Flask Modifiers: Bubbling (Prefix), Enduring (Prefix), Experimenter's (Prefix), of the Deer/Walrus/Penguin (Suffix), of the Lizard/Skink/Iguana (Suffix)
Tip: Use Bestiary crafting with Einhar for deterministic suffix crafting.
Use an Orb of Alchemy
Obtaining Orbs of Alchemy: These can drop from monsters or be obtained by vendoring items with certain modifiers.
Usage: Convert a normal (white) item into a rare (yellow) item, adding multiple modifiers.
Kill a Rare Monster
Monster Rarity: Monsters have rarities like items: Normal, Magic, Rare, and Unique.
Finding Rare Monsters: They spawn naturally or through specific content like Strongboxes.
Fully clear the Fetid Pool
Location: The Fetid Pool is part of the Act 1 side quest "A Dirty Job."
Quest Reward: Completing this quest grants a Book of Regrets, providing 2 Respec Passive Points.
This challenge is designed to help you understand the basics of gearing your character at an early level. By completing these tasks, you'll gain valuable experience in item management and character development.
2. Starting Settlements (Very Easy)
Complete each of the following Settlers of Kalguur tasks:
Enter Kingsmarch
Talk to Johan, the King's Hand, in the Act 1 town to enter Kingsmarch.
Hire workers x 3
Speak to Raulf, the Recruiter, in Kingsmarch. Establish Recruitment with him to view the list of available workers. Hire three workers from the list. You can refresh the stock by paying Gold. Workers have an initial recruitment fee and hourly wages but don't drain funds if idle.
Have at least 1,000 gold in the Kingsmarch Treasury at once
Establish Recruitment with him to view the list of available workers. Hire three workers from the list. You can refresh the stock by paying Gold. Workers have an initial recruitment fee and hourly wages but don't drain funds if idle.
Establish Kingsmarch Jobs x 4
Mining: Unlocks at Recruitment level 1. Extract raw ores for upgrades and shipments.
Shipping: Unlocks at Recruitment level 1. Send resources to different locations for loot.
Farming: Unlocks at Recruitment level 2. Grow crops for resources and upgrades.
Smelting: Unlocks at Recruitment level 2. Refine ores into bars for shipments and upgrades.
Disenchanting: Unlocks at Recruitment level 5. Disenchant equipment into Thaumaturgic Dust.
Mapping: Unlocks at Recruitment level 7. Run maps for items.
This challenge is an introduction to the Settlers of Kalguur mechanics, teaching you how to manage resources, hire workers, and set up your town effectively. Complete these tasks to familiarize yourself with the automation mechanics and resource management.
3. Peddler's Produce I (Very Easy)
Complete vendor recipes to receive each of the following items. A vendor recipe is when you trade a specific combination of items to a vendor, not when you buy items from their purchase screen:
Ruby, Topaz or Sapphire Ring
Vendor a Red, Green or Blue Gem and an Iron Ring
Agate, Turquoise or Citrine Amulet
Vendor any pair of two types of Amber, Lapis, Jade Amulets and an Orb of Transmutation
Onyx Amulet
Vendor a Red, Green and Blue Gem and an Amulet
Magic Boots with 10% increased Movement Speed
Vendor any Normal Rarity Boots, Quicksilver Flask and Orb of Augmentation
These vendor recipes are straightforward and a great way for beginners to learn the basics of crafting in Path of Exile. By mastering these, you can efficiently enhance your gear and progress in the game.
4. Act Adversaries I (Very Easy)
Complete each of the following encounters:
Act 1: Merveil, the Twisted
Act 2: Vaal Oversoul
Act 3: Dominus, Ascendant
Act 4: Malachai, The Nightmare
Act 5: Kitava, the Insatiable
As you progress through the acts, you'll face the first-half act bosses. Learning their mechanics is crucial for advancing efficiently. This is especially useful for new players aiming to "speedrun" the campaign.
5. Antagonistic Acts (Very Easy)
Complete each of the following encounters:
Defeat a monster holding an Essence
Start encountering in Act 1, The Flooded Depths. Essence monsters are frozen packs. Click them three times to release and defeat them.
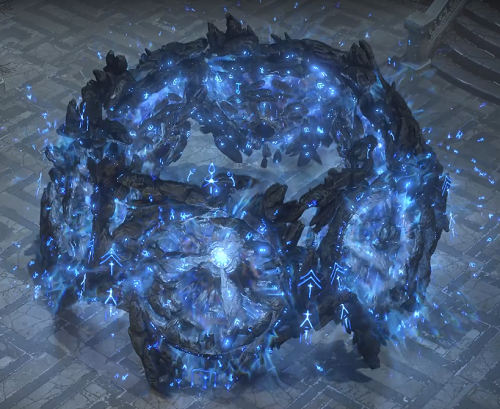
Complete a Legion Encounter
Begin seeing these in Act 1, The Climb. Activate the giant purple crystal to release two legions. Damage enemies in stasis to free them, then defeat them for loot.
Open a Strongbox
Found throughout Wraeclast. Click to open the strongbox, releasing monsters. Use currency to reroll for better rewards, increasing risk.
Complete a Ritual
Encountered from Act 2, The Northern Forest. Activate the Ritual Circle, defeat enclosed enemies, and earn Tribute. Spend Tribute on rewards, but it doesn’t carry over to the next area.
These encounters are part of the core game, introduced in the 3.24 update, and provide a great introduction to various mechanics. You can find them easily during the campaign and maps.
6. Basic Beginnings (Easy)
Complete each of the following Settlers of Kalguur tasks:
Complete a Shipment
To complete a shipment, you'll need to reach Establishment Recruitment Level 1 in Kingmarch Town. Unlock the shipment service to send resources to ports in exchange for rewards. Ensure you have at least 100 resource values ready to ship. Be cautious, as increasing the shipment load heightens the risk of negative outcomes during the voyage.
Have a total of 1,000 of any Bar in your Kingsmarch Stockpile at once
Stockpiling 1,000 bars requires reaching Establishment Recruitment Level 2 and unlocking smelting in Kingmarch. Convert ores into refined bars by sending workers to the smelting station. Keep an eye on your ore supply to prevent idle workers. Different bars require specific smelting levels, such as Crimson Iron Bar and Orichalcum Bar at level 1, and more advanced bars like Verisium Bar at level 7.
Have a total of 1,000 of any Crop in your Kingsmarch Stockpile at once
For crop stockpiling, achieve Establishment Recruitment Level 2 and unlock farming in Kingmarch. Assign workers to grow crops using Gold on farming plots. Ensure there’s enough Gold in the treasury to keep workers active. Certain crops need specific farming levels, with basic crops like Wheat and Corn at level 1, and advanced ones like Blue Zanthimums at level 7.
Disenchant an item
Disenchanting an item requires Establishment Recruitment Level 5. Once you unlock disenchantment in Kingmarch, use Rog, the Disenchanter, to convert equipment into Thaumaturgic Dust. The process is influenced by item rarity, with higher-tier items producing more dust. Disenchantment levels determine what can be processed, starting with Magic rarity at level 1 up to Unique rarity at level 11.
Use any Runesmithing Craft
To use Runesmithing Craft, reach Establishment Recruitment Level 2 and set up runesmithing beside the smelting station in Kingmarch. Enchant your weapons with Kalguuran modifiers at Dannig’s table. Gather runes by fulfilling “favoured resources” at ports or defeating a Settlers of Kalguur boss, enhancing your arsenal with unique modifiers.
7. Act Adversaries II (Easy)
Complete each of the following encounters:
Act 6: Tsoagoth, The Brine King
Act 7: Arakaali, Spinner of Shadows
Act 8: Lunaris, Eternal Moon and Solaris, Eternal Sun
Act 9: The Depraved Trinity
Act 10: Kitava, the Insatiable
These bosses appear naturally as you advance through the game's storyline. It's an easy challenge, ideal for new players to learn about boss mechanics and improve their speedrunning skills through the campaign.
8. Powerful Prey (Easy)
Complete each of the following quests:
The Great White Beast
Act 2 Quest from Yeena in The Den (accessible from the Old Fields)
Sever the Right Hand
Act 3 Quest from Maramoa in The Ebony Barracks
The Gemling Legion
Act 8 Quest from Maramoa in the Grain Gate
Fastis Fortuna
Act 9 Quest from Petarus and Vanja in the Foothills
These side quests offer various item rewards that can enhance your journey through the campaign. If you missed any, consider going back to complete them for potential improvements.
9. Atlas Augmentations (Very Easy)
Complete any three of the following League Mechanic encounters the specified number of times.
Defeat Essence monsters x 30
Essence monsters are trapped and need to be clicked three times to release them. Upon defeat, the rare monster releases essences for crafting. Use essence-related atlas passives. Equip Essence Scarabs when opening maps. Apply the Essence map device modifier (costs 6 Chaos Orbs). Complete Kirac's master mission with essence objectives.
Open Strongboxes x 30
Strongboxes contain loot and monsters. They can be modified with currency for better rewards. Use strongbox-related atlas passives. Equip Ambush Scarabs when opening maps. Apply the Ambush map device modifier (costs 4 Chaos Orbs). Complete Kirac's or Alva's quests with strongbox objectives.
Activate Shrines x 30
Shrines provide bonuses and are guarded by monsters. Use shrines-related atlas passives. Equip Domination Scarabs when opening maps. Apply the Domination map device modifier (costs 3 Chaos Orbs). Complete Kirac's quest related to shrines.
Defeat Harbingers x 30
Harbingers spawn minions and are immune until their minions are defeated. Use harbinger-related atlas passives. Equip Harbinger Scarabs when opening maps. Apply the Harbinger map device modifier (costs 4 Chaos Orbs). Complete Kirac's harbinger missions or The Beachhead map.
Defeat Possessed Monsters x 30
Torment spirits possess monsters, enhancing them and increasing their loot. Use torment spirit-related atlas passives. Equip Torment Scarabs when opening maps. Apply the Torment map device modifier (cost 2 Chaos Orbs). Complete Niko's related quest.
Defeat Rogue Exiles x 30
Rogue Exiles resemble players and drop full sets of equipment. Use rogue exiles-related atlas passives. Equip Anarchy Scarabs when opening maps. Apply the Anarchy map device modifier (cost 2 Chaos Orbs). Complete specific master missions or find them in strongboxes.
Defeat Rare Beyond Monsters x 30
Beyond monsters spawn from portals that appear when enemies are killed close together. Use beyond-related atlas passives. Equip Beyond Scarabs when opening maps. Apply the Beyond map device modifier (cost 5 Chaos Orbs). Complete Kirac's related master mission.
By selecting the tasks you enjoy or find the quickest, such as Strongboxes, Essences, and Shrines, you can tailor the challenge to your playing style and preferences, making the process more enjoyable and efficient. The flexibility to choose from different league mechanics and the requirement to complete only three out of seven options indeed makes this challenge more user-friendly and less tedious compared to previous iterations. Focusing on these faster tasks will help you breeze through the challenge, allowing you to reap the rewards and enjoy the gameplay without it feeling like a grind. Happy hunting in your selected encounters!
10. Meaningful Mechanics (Normal)
Complete any four of the following League Mechanic encounters the specified number of times:
Complete Breaches x 30
Activate purple hand breaches on the ground to spawn monsters. Kill them quickly to expand the circle. Use breach-related atlas passives. Add Breach mods through Kirac’s map device (3 chaos orbs). Use maps with additional Breaches or Breach Scarabs. Complete Kirac's or Niko's breach-related missions.
Complete Abysses x 30
Follow ground cracks that spawn monsters, leading to more spawns or an abyssal chest. Allocate Abyss-related atlas passives. Use Abyss Scarab or Abyss mod from the map device (4 chaos orbs). Choose maps with additional Abysses. Complete Kirac's Abyss missions.
Complete Expeditions x 30
Assist Kalguuran members in excavating chests from act 6 onwards. Use Expedition-related atlas passives. Open maps with an Expedition Scarab or Expedition mod (6 chaos orbs). Complete Kirac's Expedition missions.
Harvest Plots x 100
Engage in Harvest encounters, kill monsters from crops, and use the lifeforce for crafting. Use Harvest-related atlas passives. Open maps with a Harvest Scarab or Harvest mod (6 chaos orbs). Complete Kirac's Harvest missions or Einhar's quest.
Complete Legion Encounters x 30
Activate Legion encounters by freeing and defeating stasis monsters around a purple crystal. Utilize Legion-related atlas passives. Use Legion mod from Kirac’s map device (5 chaos orbs). Open maps with additional Legion Encounters or Legion Scarabs. Complete Kirac's Legion missions.
Open Smuggler's Caches x 30
Find and open Smuggler's Caches from Act 6 onwards for contracts and rogue markers. Use Heist-related atlas passives. Open maps with additional Smuggler's Caches. Use Heist mod from map device (5 chaos orbs). Complete Kirac's Smuggler's Cache missions.
Pass through Mirrors of Delirium x 30
Encounter Mirrors of Delirium, pass through them to start fog-enhanced monster battles. Use Delirium-related atlas passives. Add Delirium mod from Kirac’s map device (7 chaos orbs). Complete Kirac's Delirium missions.
Complete Ultimatum Waves x 200
Face challenges in Ultimatums, choosing to continue for tougher waves or take the loot. Allocate Ultimatum-related atlas passives. Use Ultimatum Scarab or Ultimatum mod (5 chaos orbs). Choose maps with Ultimatum encounters. Complete Kirac's Ultimatum missions.
Complete Blights x 30
Engage in tower defense-like Blight encounters starting from Act 3; defend against monsters with towers. Use Blight-related atlas passives. Open maps with a Blight Scarab or Blight mod (4 chaos orbs). Complete Kirac's Blight missions.
Complete Rituals x 100
Activate and complete rituals to earn tribute for purchasing items. Use Ritual-related atlas passives. Open maps with Ritual modifiers or Blood-filled Vessels. Use Ritual mod from map device (4 chaos orbs). Complete Kirac's Ritual missions.
11. Proven Professionals (Normal)
Complete any two of the following Master Mission encounters in Red or Purple Tier Maps the specified number of times:
Niko Missions x 30
You can increase the chance of getting Niko Mission spawning in your map by allocating ”Frantic Mining”, and a few small nodes from atlas passives. You could also force spawn Niko mission into your map by opening your map together with a Niko scarab in the map device.
Einhar Missions x 30
You can increase the chance of getting Einhar Mission spawning in your map by allocating ”Eternal Hunt”, and a few small nodes from atlas passives. You could also force spawn Einhar mission into your map by opening your map together with a Bestiary scarab in the map device.
Jun Missions x 30
You can increase the chance of getting Jun Mission spawning in your map by allocating “Covert Stakeouts”, and a few small nodes from atlas passives. You could also force spawn Jun mission into your map by opening your map together with a Betrayal scarab in the map device.
Alva Missions x 30
You can increase the chance of getting Alva Mission spawning in your map by allocating “Just in Time!”, and a few small nodes from atlas passives. You could also force spawn Alva mission into your map by opening your map together with a Incursion scarab in the map device.
For Red Maps, there's no specific tier requirement. You can increase your chances to 100% by speccing into these on the Atlas or by using their respective Scarabs. These tasks aren't particularly challenging, but it's advisable to synchronize them with the Magnificent Mastery for more efficient progress.
12. Refined Reagents (Easy)
Have at least the specified amount of the following Resources in your Kingsmarch Stockpile at once:
1,000 Wheat
1,000 Corn
1,000 Pumpkin
1,000 Orgourd
1,000 Blue Zanthimum
1,000 Crimson Iron Bars
1,000 Orichalcum Bars
1,000 Petrified Amber Bars
1,000 Bismuth Bars
1,000 Verisium Bars
20,000 Thaumaturgic Dust
This challenge is straightforward and simple. Be mindful to save your resources rather than spending them immediately if you aim to unlock this. The food and bars are listed by their rarity and progression order. This task encourages you to delve deeper into the mechanics introduced in the Settlers of Kalguur, building on challenges No.2 and No.6. Each resource type required will necessitate specific upgrades at Kingsmarch’s stations, which primarily demands patience—you will gradually unlock all necessary resources as you upgrade Kingsmarch.
13. Crafty Currency (Easy)
Use each of the following Currency items. Using Crafting Bench options also count towards this challenge:
Orb of Transmutation
Orb of Augmentation
Orb of Alteration
Orb of Chance
Orb of Alchemy
Orb of Scouring
Orb of Fusing
Jeweller's Orb
Chromatic Orb
Orb of Annulment
Regal Orb
Chaos Orb
Exalted Orb
Blessed Orb
Divine Orb
This challenge is incredibly straightforward. The use of the crafting bench counts towards the challenge, increasing the likelihood that you can apply valuable currencies to items beneficial to yourself or others, possibly recouping some costs. You can also leverage Tiny's Trial from the Betrayal league when he's in Transportation or Research to complete tasks involving Divine Orb and Exalted Orb. The Research position additionally offers an Annulment.
The more challenging currencies for this challenge are the Exalted Orb and Divine Orb. However, rather than relying solely on luck to find them, you can craft or purchase these orbs if you have bad RNG. Not every player experiences good RNG in this game, which is often akin to gambling. With sufficient grinding, you should be able to acquire a Divine Orb from other players using the chaos orbs you've collected from map runs.
Cheap Method: Utilize the Immortal Syndicate mechanic, where Guff's safehouse rewards provide you with a free opportunity to use a set of currencies on a single normal item. The division Guff is in affects the available currencies, and his rank determines how long (10/15/20 seconds) you have to use the crafting bench.
14. Overwhelming Opposition (Normal)
Defeat 500 Map Bosses.
This challenge involves defeating map bosses and can be efficiently tackled using maps with multiple bosses like City Square, where each map counts multiple times towards the challenge. Using scarabs can add more bosses, reducing the grind to around 100 maps for most players.
The Atziri encounter counts for 6 bosses, allowing progress without needing high-tier maps. For faster completion, opt for maps like Racecourse or City Square, and consider crafting maps with the “Area contains two Unique Bosses” modifier to double the number of bosses. Additionally, any extra bosses spawned by The Maven when she witnesses your map boss, facilitated by the “Destructive Play” keystone from atlas passives, also count towards this challenge.
15. Potent Pantheon (Normal)
Fully upgrade any single Major and Minor Pantheon Power:
Major Pantheon Power
Major pantheon powers are the one with a bigger circle that is mostly located at the upper part of the pantheon system(press button “Y” to access it).
Minor Pantheon Power
Minor pantheon powers are the one with a smaller circle that is mostly located at the bottom part of the pantheon system.
16. Unbelievable Undertakings (Normal)
Complete any four of the following encounters where the area level is 81 or higher:
Breachstones x 5
For the Breach mechanic challenge, collect 100 Splinters from breach encounters to form a Breachstone. Insert this into a map device to enter a Breachlord's domain. You only need to complete 4 Breachstones, making this an easy task. Simply purchase the cheapest Breachstones, run them, and consider inviting experienced players for assistance if needed.
Abyssal Depths x 5
In the Abyss mechanic challenge, Tier 11+ maps may open an entrance to the Abyssal Depths at the end of a successful abyss encounter, typically after the 4th pit. This area contains greater treasures and an Abyssal Lich boss. To enhance your chances of accessing the Abyssal Depths and meet the challenge of finding 5 entrances, allocate the "Awakened Depths" atlas passive, which increases the probability of abyss encounters leading to Abyssal Depths.
Logbooks with at least 10 Remnants active x 5
In the Expedition mechanic, remnants appear as shown in the left picture and can be detonated to buff rewards and increase difficulty in encounters with runic monsters and chests. Be cautious of yellow-highlighted mods that may challenge specific builds, and prioritize detonating the most beneficial remnant first to manage difficulty effectively. Expedition Logbooks, rare drops from runic monsters, can be crafted into magic or rare versions for better rewards but require NPC Dannig to open. Choose wisely from available areas within the logbook to maximize your gains.
Tier 4 Harvest Seeds x 5
The Harvest mechanic challenge involves defeating a Tier 4 seed monster, which serves as a mini-boss among harvest creatures, including Ersi, Mother of Thorns from Wild Thornfruit; Janaar, the Omen from Primal Blisterfruit; and Namharim, Born of Night from Vivid Scalefruit. While these mini-bosses aren't particularly challenging to fight, finding them can be difficult. For practice, the Bramble Valley Map features bosses identical to these harvest bosses. The difficulty of this challenge has increased from needing to defeat 3 to now 5 of these bosses. Fortunately, the challenge completion can be shared among all party members present in the map at the time of the monster's release. To facilitate completing this challenge, consider performing Einhar's Memory of the Sacred Grove quest, using a Harvest Scarab of Cornucopia, or allocating the “Heart of the Grove” from the atlas passives to enhance the likelihood of encountering these Tier 4 seed bosses.
Domains of Timeless Conflict with at least 25 rewards x 3
The Legion mechanic challenge requires completing 3 Domains of Timeless Conflict with at least 25 rewards each. Activate the encounter by inserting timeless emblems into your map device; using various emblems enhances both rewards and difficulty, extending the fight's duration. The challenge starts when you enter the central grey circle of the map, and you can reset the monsters between waves by returning to this circle. Focus on defeating treasure-bearing monsters to accumulate treasure icons above your EXP bar. Collect your rewards from the central circle after time expires. Timeless emblems are crafted by combining 100 timeless splinters from specific legions encountered in maps. With a high-clear-speed character, achieving 25 rewards is straightforward. If needed, participate in a "5way legion leveling" service for easier completion.
Blueprints with 4 revealed wings x 5
Simulacrum Waves x 60
The Delirium mechanic challenge involves completing 60 waves of the Simulacrum. Begin by collecting Simulacrum splinters from Delirium encounters, which start when you pass through a misty mirror from Act 5 onward. Splinter yield increases with the number of monsters killed and the distance traveled from the encounter's start, escalating both difficulty and rewards. Once you accumulate 300 splinters, they form a Simulacrum map fragment. Originally, Simulacrum featured up to 30 waves, but post-update 3.25, the first 15 were removed due to community feedback, leaving 15 challenging waves. These waves grow tougher and more rewarding, with increased chances of Delirium boss appearances. Given the high difficulty, seeking assistance through community channels like Global 820 or 4040 is advisable if your gear or build is insufficient.
Trialmaster fights x 3
The Trialmaster is the unique boss from the Ultimatum league, encountered only on the final wave (10th) of an Ultimatum challenge in Tier 14+ maps. After completing the last wave, there's a chance of being teleported to the Trialmaster's domain for a fight, carrying over the modifiers selected during the Ultimatum. The appearance of the Trialmaster is largely influenced by RNG, but chances can be improved by allocating the "Brave The Tower" atlas passive or using an Ultimatum Scarab of Dueling on a Tier 16 map. This boss fight is a one-time event; any death, exit, or disconnection during the encounter means you'll fail and need to re-encounter the Trialmaster to complete the challenge.
Blighted or Blight Ravaged Maps x 5
The Blight mechanic challenge requires you to complete 5 Blighted or Blight Ravaged maps. Blighted maps can be obtained from Blight encounters, specifically from the Blight reward chests. Blight Ravaged maps, which are more challenging versions featuring faster and stronger monsters, are exclusively available from Tier 13+ Blighted maps and can be anointed with up to 9 oils (3 oils per type maximum). Additionally, you can acquire Blighted maps through Kirac’s missions, where he sometimes offers them. If you want to increase your chances of getting Blighted maps from Kirac, you can use the Blighted Scouting Report to reroll his offered maps into Blighted versions. This provides multiple avenues to meet the challenge requirements efficiently.
All Rituals in Maps with at least one Blood-filled Vessel applied x 15
The Ritual mechanic challenge requires you to complete 15 encounters using Blood-filled Vessels. You can obtain Ritual Splinters from ritual encounters, which turn into a Ritual Vessel after collecting 100. Use these vessels during rituals to capture monsters and create a Blood-filled Vessel, which can be combined with a map to enhance ritual encounters, providing more rewards and tribute points. Alternatively, enhance your chances of obtaining a Blood-filled Vessel by using the "Sacrificial Due" atlas passive, which has a 15% chance of dropping one from the last ritual in a map. If gathering them yourself is too cumbersome, you can also purchase Blood-filled Vessels from other players, simplifying the completion of this challenge.
17. Sublime Starlight (Normal)
Use the following Runes in Runesmith Crafting:
Sun Rune
Usable on runesmithing Level 1.
Bounty Rune
Usable on runesmithing Level 6.
Bound Rune
Usable on runesmithing Level 2.
Journey Rune
Usable on runesmithing Level 7.
Life Rune
Usable on runesmithing Level 3.
Mountain Rune
Usable on runesmithing Level 8.
War Rune
Usable on runesmithing Level 4.
Time Rune
Usable on runesmithing Level 9.
River Rune
Usable on runesmithing Level 5.
Power Rune
Usable on runesmithing Level 10.
Runes in the game are primarily acquired by completing "Favoured Resources" requests at the shipment ports of Riben Fell, Pondium, and Kalguur, or by defeating bosses from the Settlers of Kalguur league. To utilize these runes, you must first upgrade your Runesmithing establishment in Kingsmarch. It's important to note that runesmith crafting is restricted to non-unique weapons only, adding an extra layer of strategy to equipment customization.
18. Achieve Ascension (Normal)
Use the Ascendancy Device in each of the following Labyrinths:
The Labyrinth(Normal Difficulty):
Act1 The Lower Prison
Act2 The Crypt Level 1
Act2 The Chamber of Sins Level 2
Act3 The Crematorium
Act3 The Catacombs
Act3 The Imperial Gardens
The Cruel Labyrinth(Cruel Difficulty):
Act6 The Prison
Act7 The Crypt
Act7 The Chamber of Sins Level 2
The Merciless Labyrinth(Merciless Difficulty):
Act8 The Bath House
Act9 The Tunnel
Act10 The Ossuary
The Eternal Labyrinth(Uber Difficulty):
Big changes were made to The Lord’s Labyrinth in patch 3.16, mainly the fact that now not all 6 trials need to be completed in order to gain access to The Eternal Labyrinth, greatly increasing the speed at which end-game players can access the lab and get their final 2 ascendancy points. You still need an Offering to the Goddess, which you still get from Ascendancy Trials in maps, but from 3.16 onwards, Ascendancy Trials will only start appearing in yellow or higher tier maps(Tier6+).
The labyrinth will get easier if you practice it more, if your build can't do it, just pay someone to do it for you or look on poelab for helpful tips when clearing it.
19. Divined Destiny (Normal)
Complete any three of the following Divination Card tasks:
Open 5 Diviners Strongboxes
This strongbox contains divination card rewards, and can be found everywhere, you can even increase this type of strongbox spawn rate in maps by allocating the small passive around “Vault of Mysteries” from atlas passive. This strongbox also spawns very oftenly from the strongbox room in Temple of Atzoat.
Turn in 50 sets of Divination Cards
This one is easy, just turn in any completed set of cards to Tasuni in Highgate Town(Act4/9) or with Lilly Roth in your hideout(after you invited her to your hideout) to redeem the card’s reward, do this 50 times to complete the challenges. Might wanna set your loot filter to be less strict so that the more common and cheap divination cards can be used to complete this challenge easily too.
Complete 25 Rare Tier 11 or higher Maps with at least one Divination Scarab applied
To do this challenge, just open any Tier11+ map with any 1 of these divination scarabs, complete the map 25 times then you’ll complete this challenge easily.
Scry a Map
Scrying is a new feature that was added in the 3.25 update, where in Tier16+ maps, a random spawn NPC named Nameless Seer will give you the option to Scry a map. This allows you to replace the divination cards that typically dropped in the current map where you found the Nameless Seer from, with another map of your choice on the atlas UI. You can scry multiple maps at once, but any single map can only have one scry active at a time. You can also remove the scried map, by applying Orb of Scouring on the scried map in the atlas UI.
20. Peddler's Produce II (Easy)
Complete vendor recipes to receive each of the following items. A vendor recipe is when you trade a specific combination of items to a vendor, not when you buy items from their purchase screen:
Prismatic Ring
Vendor the 3 different types of Two-stone Rings (fire and cold; cold and lightning; lightning and fire).
Orb of Fusing
Vendor 1 6-linked sockets item.
Regal Orb
Vendor a full set of rare items with its item level above 75.
Grasping Mail or Loreweave
Vendor 60 breach rings.(For grasping mail)
Vendor 60 unique rings.(For loreweave)
Vendor 3 Grasping Mail or Loreweave.(The reroll method)
A good introduction of vendor recipes to newbies, doing vendor recipes is the best way to get rich easily in PoE. Pretty similar to challenge No.3, but this time the recipes involved are harder and more late-game focused.
21. Chaotic Creations (Very Easy)
Use a Chaos Orb on any five of the following item base types while they are Item Level 83 or higher:
Experimented
This item base can only be obtained from the final reward rooms of blueprints from heist mechanics.
Ritual
This item base can only be obtained from ritual mechanics.
Atlas
This item base can only be found anywhere.
Abyss
This item base can only be obtained in Abyssal Trove chests from abyss mechanics.
Expedition
This item base can only be obtained from expedition mechanics.
Rogue Equipment
This item base can only be obtained from heist mechanics.
Cluster Jewel
This item base can only be obtained from delirium mechanics.
This challenge wants to introduce special base items in the game which some of them were from other leagues or expansions then integrated into the core game. This is a relatively easy challenge, as most of these base item types are quite common, you can even buy them from other player at a very cheap price, then applied it with chaos orb to finish this challenge, just make sure the item you bought is item level 83 or above(from Tier16+ maps).
Only need to do 5 out of 7 of them, all of them are pretty easy and cheap to obtain but if I had to choose which 2 to avoid, it would be Experimented and Rogue Equipment because I don’t like doing heist mechanics.
22. Gilded Goals
Have at least 250,000 gold in the Kingsmarch Treasury at once:
Natural (All gold): Essence - Shrines - Ritual (Pack) - Extra pack Scarabs
Added (Some gold): Alva - Legion - Blight - Rogue Exile - Ritual (Respawn)
Spawned (No Gold): Delirium - Beyond - Breach
This challenge requires you to put gold into the Kingsmarch Treasury, and gold is dropped everywhere, killing higher level monsters in higher tier maps does drop even more gold. Most common strategy right now to farm a lot gold very fast is from Delve content and Vaults of Atziri map.
There might be a small issue where your workers consume your Kingsmarch Treasury’s gold pretty fast, thus it becomes hard to reach this high number. Best way to do is just start hoarding a lot of gold in your inventory first. And when your inventory gold reaches the required number, only then store all the gold in the treasury to complete this challenge.
23. Remarkable Realms (Normal)
Complete each of the following Unique Maps:
Acton's Nightmare
Caer Blaidd
Death and Taxes
Doryani's Machinarium
Hallowed Ground
Oba's Cursed Trove
Olmec's Sanctum
Pillars of Arun
Poorjoy's Asylum (The Dreamland)
The Coward's Trial
The Vinktar Square
Vaults of Atziri (Treasure Hunter,The Wolf’s Legacy)
Whakawairua Tuahu
This challenge will be slightly easier to complete as you keep grinding end game maps, collecting divination cards that reward unique maps(The Encroaching Darkness) and naturally dropping unique maps. Even if your RNG is not in your favor for collecting these maps, you could easily buy most of the unique maps here, as most of the unique maps are quite cheap.
Your also can make use of Kirac’s missions by using Singular Scouting Report which rerolls his offered maps with a new one and will contain at least 1 unique map within them in each tier(white,yellow,red) if you have left over chances within them., although there are 2 unique maps that he can’t offer, which are Vinktar's Square and Doryani's Machinarium. You can get these atlas mission’s chances by dailies or by completing maps.
Doryani's Machinarium will be the rarest one among all other unique maps because you can only obtained it from a delve boss called Ahuatotli, the Blind, but it could also spawn from red tier Kirac’s Mission too when using Comprehensive Scouting Report.
As for Whakawairua Tuahu annoying boss fight, there’s a trick to defeat it with most builds, get a Balefire unique sceptre on weapon swap and run the lowest tier of the unique map to cheese the boss fights easily by using Scorching Ray skill from the sceptre .
Also look out for people sharing unique map completion on Global Chat channel 820 and 4040.
24. Sanctified Scarabs I (Normal)
Complete Maps with 500 Scarabs. Each Scarab applied to maps counts towards this Challenge:
With the 3.24 update, scarabs has been reworked significantly, changed into 3 or 4 different types per league’s mechanic instead of tiers. Scarab can be dropped everywhere, although there still other way to obtain scarabs more efficiently such as from Operative Strongbox(“Secret Operations”), Divination Cards, and Immortal Syndicate mechanic depending on which syndicate members is in which division. There’s a vendor recipe to reroll scarab by vendoring any 3 scarabs, doesn’t have to be the same. Also, some of the scarabs can be used more than once on the map device, depending on the scarab limit which is mentioned in the scarab tooltip, just have to put them in different slots, or else it still consumes one even though you put in stacks.
500 might be a big number but, if you have 5th and 6th slot unlocked on your map device(refer challenge No.36 on how to unlock them), and be able to run 5 scarabs on every map, this challenge could only take around 100 maps to complete. You can buy Scarabs in bulk from the Path of Exile Trading website to rush this challenge.
25. Gleaming Gems (Normal)
Complete each of the following Gem tasks:
Level 10 gems to level 20
Gems gain experience as our character gains experience, and they do not lose experience when our character dies. Gems still gain experience when equipped in our swap weapon(“X” default button). There’s also other ways of gaining gem experience besides the ordinary leveling way; which is from divine font’s reward in the labyrinth, or from Tora’s rewards when she’s in the Research Division of betrayal mechanic.
Gem will level 20 when our character reaches around level 80 above. 10 gems might sound a lot but if you are gearing full gems on all of your equipment, this shouldn’t be a problem because you’re actually leveling more than 10 gems at this point.
Use 40 Gemcutter Prisms
A gemcutter’s prism is a currency item that can be used to improve the quality of a gem. Each gemcutter's prism usage will always raise the quality of a gem by 1%. Gemcutter's Prism can drop anywhere and can be obtained through vendor recipe, by vendoring a single 20% quality gem, or multiple gems with a total quality of 40% or more.
Turn in a divination card set that rewards a Level 21 and/or 23% Quality Gem
Divination card’s reward that satisfy this requirement: The Cataclysm, The Wilted Rose, Deathly Designs, The Bones (Best Choice), The Bitter Blossom, The Hook, Terrible Secret of Space, The Magma Crab, A Chilling Wind, Dialla's Subjugation, The Skeleton, Deathly Designs, Desecrated Virtue
Use the Divine Font in the Endgame Labyrinth 10 times
Divine Font’s rewards have been heavily reworked in the 3.23 update. Divine Font is an interactable object that appears in the final room of the Lord's Labyrinth after defeating Izaro. It serves as a crafting bench that can transform and sacrifice skill gems for various gem and labyrinth-related effects, including being the exclusive method to obtain transfigured skill gems. For this challenge it requires you to grind the Eternal difficulty labyrinth that requires Offering to the Goddess item to enter, thankfully it doesn’t require the empowered version of labyrinth so should be fine. When running a labyrinth, you might wanna seek out darkshrine that can be found in hidden areas(mostly behind walls with levers), because sometimes the darkshrine might reward you with additional uses for the divine font, thus reducing the time needed to grind for this challenge.
26. Cross Contamination (Normal)
Complete any 4 of the following past league content encounters:
Defeat a Harbinger while you are in a Breach
Just make sure there’s harbinger and breach mechanic spawn in your map first by using the following options: Taking harbinger and breach-related atlas passives. Opening map with Harbinger Scarab, Breach Scarab. Opening map that contains the “Area contains # additional Harbingers” implicit modifier, or “Area contains 3 additional Breaches” implicit modifier. Use Harbinger(costs 4 Chaos Orbs) mod, or Breach(costs 6 Chaos Orbs) mod from map device.
When these 2 mechanics coexist in your map, make sure both mechanics are near each other so that the breach zone can overlap with the harbinger spawn. Also highly recommended to do this challenge in a very narrow or dense map like Toxic Sewer Map, so that you’ll have a higher chance of finding these 2 encounters near each other.
Defeat a Unique Map Boss that is Possessed while in a Ritual
This challenge require a bit of RNG, just make sure there’s torment spirit and ritual mechanic spawn in your map first by using the following options: Taking torment spirit and ritual-related atlas passives. Opening map with Torment Scarab. Opening map that contains the “Areas contain Ritual Altars” implicit modifier, or “Area is haunted by 5 additional Tormented Spirits” implicit modifier. Use Ritual(costs 4 Chaos Orbs) mod, or Torment(costs 2 Chaos Orbs) mod from map device. Open map with Blood-filled Vessel to force spawn ritual in your map.
When these 2 mechanics coexist in your map, you need to find a torment spirit that’s spawned near a ritual encounter, try to kill them near the ritual so that it’ll get revived by the ritual later. Best map to do this challenge is maps that have narrow layout such as Toxic Sewer Map, so that the torment spirit won’t have space to run away and much easier to get consumed by the ritual when killed.
Defeat a Breachlord while affected by a Shrine
This is a bit easy, just make sure there’s breach and shrine mechanic spawn in your map first by using the following options: Taking breach and shrine-related atlas passives. Open map with Breach Scarabs, Domination Scarab, and Breach Scarab of Lordship. Opening map that contains “Area contains # additional Breaches” implicit modifier, or “Area contains # additional Shrines” implicit modifier. Use Breach(costs 3 Chaos Orbs) mod, or Domination(costs 3 Chaos Orbs) mod from map device.
When these 2 mechanics coexist in your map, you have to do a few breach encounters in the map first until you found one that actually spawns a breachlord(will shown in your mini-map). When found, try to find any shrine that’s near the breachlord spawn, take the shrine buff only then try to kill the breachlord while having a shrine buff to complete this challenge. Although this method may sound pretty tricky but, it can be made easier by wearing Blunderbore or The Gull unique item that uses their own special shrine, which makes this challenge much easier to do without worrying about the map having shrines or where the shrines are when killing a breachlord for this challenge.
Defeat a Blight Boss while Delirious
This challenge is pretty easy, just make sure there’s blight and delirium mechanic spawn in your map first by using the following options: Taking blight and delirium-related atlas passives. Opening map with Delirium Scarab, Blight Scarab and Blight Scarab of Blooming. Opening map that contains the “Area contains a Blight Encounter” implicit modifier, or “Players in Area are #% Delirious” implicit modifier from applying delirium orb on the map. Use Blight(costs 4 Chaos Orbs) mod, or Delirium(costs 7 Chaos Orbs) mod from map device.
When these 2 mechanics coexist in your map, start the delirium encounter first by passing through, then rush to the blight encounter and hopefully that blight encounter does contain a blight boss(white bubble above it). If there is a blight boss, continue progress the blight encounter until the blight portal spawns a blight boss, kill that blight boss while you are still in the delirium fog to complete this challenge.
Also the delirium fog will pause if you stay near an active blight encounter, and the fog will only resume moving if you stray far away from an active blight encounter or the blight encounter has ended … OR you could do this challenge with the “delirium orb” method which makes the delirium fog stay permanently in the whole map, so you won’t need to worry about the delirium fog dissipating while doing the blight encounter.
Defeat a Delirium or Beyond Boss while in the Sacred Grove
This is pretty RNG-heavy to do … just make sure there’s delirium/beyond and harvest mechanic spawn in your map first by using the following options: Taking delirium and harvest-related atlas passives or beyond and harvest-related atlas passives. Open map with Harvest Scarab, Beyond Scarab, and Beyond scarab of the Invasion/Delirium Scarab and Delirium Scarab of Neuroses. Open map that contains the “Slaying Enemies close together can attract monsters from Beyond this realm” implicit modifier, “Area contains The Sacred Grove” implicit modifier, or “Players in Area are #% Delirious” implicit modifier from applying delirium orb on the map(at least 40% delirious or more). Use Delirium(costs 7 Chaos Orbs) mod, Beyond(costs 5 Chaos Orbs) mod, or Harvest(costs 6 Chaos Orbs) mod from map device.
Don’t worry about taking too long to kill the boss inside the sacred grove though because delirium will pause when you’re inside the sacred grove room, except for the “delirium orb” method which makes the delirium effect permanently in the whole map. So just open the portal inside so that you can resurrect there if died, take your time to kill while the boss while under the delirium effect on your character in the sacred grove room to complete this challenge.
Defeat a Syndicate Member that is Possessed
This challenge is pretty RNG but there’s a trick to do this, just make sure there’s betrayal and torment mechanic spawn in your map first by using the following options: Taking betrayal and torment-related atlas passives. Open map with Torment Scarab, Betrayal Scarab, and Betrayal Scarab of Reinforcements. Open map that contains “Area is haunted by # additional Tormented Spirits” from map’s implicit modifier. Use Torment(costs 2 Chaos Orbs) mod from map device.
When these 2 mechanics coexist in your map, wait for intervention division syndicate members to spawn first by killing some monster or moving around the map a bit. When they spawn, run around the map till you see there’s a torment spirit nearby, the syndicate member will still follow you when they spawn in as they keep teleporting around you while you move around the map, and they only disappear when you die. And when you find a torment spirit, move around the spirit a bit to let the spirit AI to notice there’s a unique monster, syndicate member nearby too. With the “improved” torment spirit AI hopefully it’ll notice the syndicate member and possess it, kill that possessed syndicate member then you’ll complete this challenge smoothly.
27. Ambitious Assignments (Normal)
Complete each of the following Settlers of Kalguur tasks:
Have at least 10,000 Blue Zanthimum in your Kingsmarch Stockpile at once
Obtainable from farming level 6. This resource doesn’t need any input but gold to produce in Kingsmarch passively.
Have at least 5,000 Verisium Bars in your Kingsmarch Stockpile at once
Obtainable from smelting level 7, also requires Verisium Ore from mining station(Level6) to be able to smelt those ores into Verisium Bars.
Complete 30 Port Quotas
Port Quotas are resource requests from a shipment port, that’ll multiply the shipment value if the sending resources does match the request of course. Every resource is counted normally on the port quotas, except for ores because ore and bar resources are interchangeable, and bars contribute more points towards the port quotas(x5). For example: if the port quatas request 500 verisium ore, you can send 100 verisium bars instead of the ores as it brings more shipment values.
Try not to upgrade too much on shipment station first, so the port quotas will always request for the low amount of resources to fulfill, thus can complete this challenge easily by fulfilling low quota requests. This challenge only gets harder if you upgrade them too high as they request A LOT of resources at high levels.
Disenchant 30 Unique items
Unique rarity items can be disenchanted into Thaumaturgic Dust, which requires disenchantment station level 11 to be able to do so. Unique rarity item does require more time to disenchant when compared to disenchanting rare rarity items, but it does give more Thaumaturgic Dust than rare item does, depending on the unique item tier.
Claim rewards from Maps successfully completed by your Atlas Runners
You can only establish this mapping station for workers when your recruitment station is Level 7. This feature is really helpful to generate passive income from maps, by giving your spare maps into the Kingsmarch’s mapping station for the workers to run it for you, but the workers might die and have no way of recovering them if the map risk is too high. The rewards from mapping stations can include items exclusive to league mechanics and bosses, such as unique cluster jewels, Abyss uniques, and even guardian fragments too.
Use the Recombinator, resulting in 15 items which are Item Level 75 or higher
You can only establish this recombinator station for Isla, the Engineer when your recruitment station is Level 5. This recombinator feature was actually an old system back from Sentinel League, but the current interpretation of this feature is not as powerful as in the old days was, because there’s weighting of each merging “component” now unlike the old version which doesn’t have(everything was 50% chosen); the more valuable the modifier or item is, the lesser chance of it appearing in the output of the recombinator.
28. Magnificent Mastery
Complete one of the following Master Mission encounters:
Reach Depth Level 400 in your Azurite Mine
Best way to survive deep delves is to bring a couple of resist flasks depending on the delve modifiers, and a poison remove flask in case of the "poison on hit" mod. Also you can party up with end game build players to help get past hard modifier delves. There’s ways to sustain your sulphite usage from mapping so that you can continuously doing delve content, such as:Taking sulphite-related atlas passives, Opening map with Sulphite Scarab.
Capture 400 Red Beasts
You can speed up this challenge by doing the following methods: Taking bestiary-related atlas passives, Opening map with Bestiary Scarab, Bestiary Scarab of the Herd
Complete 40 Betrayal Safehouses
40 amounts seems achievable with mild grind. You can speed up this challenge by doing the following methods:
Executing high rank syndicate members(Rank3 max) will provide a lot more intelligence bar towards safehouses compared to executing low rank syndicates; Executing syndicate in high tier maps will provide a lot more intelligence bar towards safehouses compared to executing in low tier maps; Taking syndicate-related atlas passives; Opening map with Betrayal Scarab, Betrayal Scarab of Intelligence, and Betrayal Scarab of Reinforcements.
Upgrade 200 Incursion rooms to Tier 3
You can speed up this challenge by doing the following methods: Taking incursion-related atlas passives, Opening map with Incursion Scarabs.
29. Sanctified Scarabs II (Normal)
Complete 75 Rare Maps with at least 4 scarabs applied while the Maps have at least 80% Item Quantity and are at least Tier 16.
To master the challenge involving the new scarab mechanics from the 3.24 patch, you'll need to effectively use multiple scarabs, as allowed by their limits, to enhance your Tier 16 map. Start by crafting the map into a rare using an Orb of Alchemy, aiming for high Item Quantity (IIQ). If the IIQ isn’t sufficient, reroll it with an Orb of Scouring or a Chaos Orb. Alternatively, corrupt the map with a Vaal Orb to potentially gain an 8-mod map for even higher IIQ, though this increases difficulty. If your build struggles with tougher content, consider teaming up with experienced players. To simplify IIQ achievement, leverage the 23% free IIQ boost from the map device and atlas passives, allowing you to reach or exceed 80% IIQ on your map more easily. For additional IIQ, allocate atlas passives that enhance the effects of explicit map modifiers, but be mindful of the increased risk from tougher mods.
30. Arduous Atlas (Hard)
Complete maps with a total of 4,000 explicit modifiers.
The modifiers map grind challenge is back from the Kalandra League, now requiring fewer maps due to the lowered requirement from 6,000 maps. Applying an Orb of Alchemy or Orb of Binding to a normal rarity map usually yields around 5+ modifiers, estimating the need for approximately 800+ maps to complete this challenge, not including the faster progress possible with 8-mod corrupted maps. Unique map modifiers, including hidden ones, also count towards this challenge. For efficient progression, consider farming the Mesa Map due to its short layout and proximity of the boss to the spawn area. The strategy involves making the maps rare, corrupting them, and then rushing to kill only the boss. Although Mesa Maps might be in high demand, you can sustain them more economically by using an Orb of Horizon on Tier 4 maps to convert them to Mesa Maps. Allocating the "Singular Focus" atlas passive enhances map sustain specifically for this challenge if you set Mesa Map as your favored in the atlas ('G' key). Additionally, using Kirac’s Mission with a Vaal Scouting Report can provide a steady supply of 8-mod maps, and this method also supports progress in challenge No.35 if you aim to complete both simultaneously.
31. Monstrous Memories (Normal)
Defeat 100 Rare monsters with at least 3 Modifiers in Atlas Memories.
Do Alva's Memory of Cascading Fortunes quest, by crafting one of the strongbox with “Guarded by a Rogue Exile” modifier, causing the rest of the strongbox(open in sequence) to have this modifier too, thus spawning multiple rare monsters in a small area in sequence. Preferably doing this method in a strong party with at least one player having an “exploding” mechanic like Occultist or Chieftain, and try to avoid crafting the strongbox with “Detonates nearby corpses” modifier which is very deadly.
32. Tremendous Township (Normal)
Fully upgrade all of Kingsmarch.
The challenge involves a fair amount of passive grinding, where gold accrual is tied to monster rarity. For instance, running Olmec's Sanctum can yield about 5,000 gold in just two minutes, making it an efficient grinding spot. Completing this challenge requires mapping to actively mark Verisium, which is necessary for completing various upgrades. Since upgrades are expensive, accumulating 250,000 gold early on allows you to spend freely on these enhancements without financial constraints later in the game.
33. Agitated Adversaries (Normal)
Defeat any three of the following bosses in the specified ways while the area is level 83:
The King in the Mists without taking damage from Ritual of Meditation or Ritual of Dance
The King of the Mists boss now is part of ritual mechanic, and can be encounter through a map fragment named An Audience With The King(buy) which can only be obtained from ritual’s offers. As for this challenge, there’s 2 mechanic you have to follow:
Ritual of Dance(Catchphrase: Keep running!/Sloagarn!) - This debuff last for 8 seconds and you need to KEEP MOVING or else you’ll get imprisoning and inflicting Maim afterwards.
Ritual of Meditation(Catchphrase: Traveler's bane!/You are seen!/Rith!) - This debuff last for 8 seconds and you need to STOP MOVING or else you’ll get imprisoning and inflicting Maim afterwards, although you still can use movement skill without getting punished by this debuff.
Lycia, Herald of the Scourge without being affected by Heretic's Ire
Lycia, Herald of the Scourge, is a boss encountered at the end of the Forbidden Tome, a component of the sanctum mechanic reintroduced in the 3.22 update. This encounter becomes accessible after completing Act 10, with Sister Divinia guiding you through the process. Initially, you'll be directed to the Ossuary map to retrieve the Mortinomicon item, which is essential for accessing the sanctum. It's crucial to complete the sanctum quest first, as failing to do so prevents the Forbidden Tome from dropping.
Upon reaching the last room on the fourth floor of the sanctum, you'll face Lycia's first form, The Unholy Heretic, amidst traps and minions. Defeating this form allows access to The Beyond arena, where you confront her second form, Lycia, Herald of the Scourge. Notably, in this final form, Lycia's attacks no longer reduce your resolve points.
The challenge intensifies with Lycia's Spinning Staff Hazards skill, which unpredictably applies the Heretic’s Ire debuff. The randomness of the staff's spawn makes avoidance based on luck. To overcome this, employing a high DPS build is advisable, as it minimizes the time Lycia has to use or adjust her hazardous mechanics, allowing for a quicker and more straightforward challenge completion.
Izaro in the Empowered Endgame Labyrinth without being hit by Ornamental Cascade
This challenge requires completion within the empowered versions of the endgame labyrinth, which are divided into three types: Eternal Labyrinth of Fortune, Opportunity, and Potential. Each type has its unique difficulty and special rewards. The Eternal Labyrinth of Fortune increases the quality of items from chests, but features a tougher Izaro, making the challenge harder. The Eternal Labyrinth of Opportunity has deadlier monsters but grants additional uses of the divine font, while the Eternal Labyrinth of Potential emphasizes deadly traps and allows the divine font to be used on corrupted skill gems.
Izaro’s Ornamental Cascade skill resembles the player's Sunder skill but is golden. If your character has high DPS, quickly defeating Izaro before he can use his skills is an effective strategy to easily complete the challenge. Obtaining the necessary offerings for entry can be straightforward in a trade league. Alternatively, you can self-acquire them by looting Izaro’s Treasure chest in the eternal or higher difficulty labyrinth, or through atlas passives such as Trial of Glory and Shaping the Skies, which increase trial spawn rates and add special crafting options to spawn improved Trial of Ascendancy in maps, yielding upgraded Offerings to the Goddess.
The Syndicate Mastermind without taking any damage from their sculpture
The Syndicate Mastermind is the final boss in the syndicate hierarchy, accessible after filling the top-middle intelligence bar on the syndicate board by interrogating high-ranking captains from each division’s safehouse. The fight involves maneuvering around the arena, avoiding a central laser beam, and dealing with phases where the Mastermind becomes invulnerable, requiring you to stand in the arena's corners. The Mastermind’s level is set at 83 if any intelligence-contributing safehouse run was at level 83 (map Tier 16). The challenge involves fighting the Mastermind while avoiding a sculpture that emits a big green flame in a clockwise direction, with the flame's speed increasing as the Mastermind weakens. Completing this challenge successfully without being hit by the green flame often hinges on quickly defeating the boss to minimize the number of dodges required.
Aul, the Crystal King after destroying all of the Crystalline Cocoons
Aul, the Crystal King, a boss in the delve mechanics, can be found at a minimum depth of 130+ within the primeval ruins biome, but for a level 83 challenge, the depth requirement is 145+. Unlike previous challenges where players needed to prevent Crystalline Cocoons from opening, this league's challenge requires destroying all of them, significantly increasing the fight's difficulty. During Aul's throne phase, Spectral Shield Charge projectiles can shatter these cocoons, which then spawn Azurite monsters and leave pools of cold damage. Furthermore, during the "bullet hell" phase, these destroyed cocoons shoot ice projectiles continuously, complicating dodging efforts. To complete this challenge, all eight cocoons must be destroyed before defeating Aul, ideally before he enters the "bullet hell" phase to avoid an exceedingly tough fight, unless your build is exceptionally resilient.
34. Extravagent Equipment (Normal)
Use any 6 of the following Currency Items:
Sacred Orb
Tailoring or Tempering Orb
Conqueror Exalted Orb
Veiled Orb
Awakener's Orb
Fracturing Orb
Hinekora's Lock
Mirror of Kalandra
Orb of Dominance
Tainted Divine Teardrop
Orb of Conflict
Reflecting Mist
This challenge is a straightforward currency expenditure task where you simply purchase and use certain items. Affordable options include Sacred Orbs, Tempering Orbs, Conqueror Exalted Orbs, Orb of Dominance, Orb of Conflict, and Tainted Divine Teardrops, costing around 400 chaos in total. It's advisable to avoid using the Mirror of Kalandra due to its high cost.
35. Inciting Invitations (Normal)
Reach a total of 3,000% Item Quantity from completing Invitations
This challenge involves managing around 60 invitations, which, while not particularly difficult, does require handling a substantial amount of content due to the mechanics of invitations. You have the option to simplify the process by purchasing both the completion of these invitations and the invitations themselves for non-Maven encounters. Highly recommended to do Polaric or Writhing Invitation instead to rush this challenge completion, for the reason of cheapest invitations and easiest boss to kill, doesn’t even need any pre-requisite boss kill to access this invitation too unlike the other invitations.
36. Realised Realms (Normal)
Complete each of the following Atlas encounters:
Unlock the 6 Slot Map Device
By default, the map device has 4 only slots. But since the 3.25 update, you can unlock up to 2 additional slots for a total of 6 slots on the map device. To unlock the additional slots, the player must do the following, in any order:
Complete a 10-boss Maven's Invitation: The Atlas for the first time; Complete a non-Valdo's Tier 17 map for the first time.
Use 10 Maven Chisels
Maven’s chisel is a new type of currency that was introduced in the 3.25 update. These currencies are only obtainable from Maven-witnessed map bosses and Maven’s Invitations. There are 5 type of Maven’s chisel, each of them has alternate quality effects, only 1 type of chisel can be applied on the map at time, chisel effect will be replace if apply by a different one.
37. Challenging Competitors (Normal)
Defeat Settlers of Kalguur Boss encounters while the area is level 83 in any four of the specified ways:
Admiral Valerius without being hit by Anchor Smash
The Admiral Valerius(guide) boss can spawn from a random shipping encounter in Kingsmarch, regardless if the shipment has risk or not. This boss will often mark an area on the ground with a blue-color-circle before dropping an anchor from the sky, dealing physical damage 50% converted to cold. Is pretty easy to avoid since this skill animation is kinda slow so you have a lot of time to run away, avoid this skill while killing the boss to complete this challenge.
Admiral Valerius without being affected by more than 5 stacks of Soaked to the Bone
The Admiral Valerius(guide) boss can spawn from a random shipping encounter in Kingsmarch, regardless if the shipment has risk or not. This boss has 2 phases, at 66% and 33% health, the boss becomes invulnerable for a duration, creating a maze of water geysers and causing tidal waves to cross the arena. These tidal waves will push you around the arena if you get hit by them, which causes you might get hit by the water geysers around the arena that apply Soaked to the Bone debuff on you. As for this challenge, try not to touch those water geysers for too long during its 2 phases while killing the boss to complete the challenge. Thankfully the challenge says not more than 5 stacks so you have some space of mistakes to not fail the challenge, just don’t touch those geysers too much or too long then you’ll be fine.
Sasan, the Bandit Lord without being hit by Circle of Flame
Sasan, the Bandit Lord boss can spawn from a random mapping encounter in Kingsmarch, regardless if the atlas runner has risk or not. The boss will sometime mark a orange-runic-circle on the ground that cast Circle of Flame skill, just dash out whenever the boss casting this skill on top of you, or avoid staying in the runic-circle for too long before the its skill actually take place in the circle while killing the boss to complete this challenge … or just have a high damage character build to kill the boss as fast as possible so that it doesn’t have time to cast its skills that could fail this challenge.
Sasan, the Bandit Lord without being hit by Hail of Arrows
Sasan, the Bandit Lord boss can spawn from a random mapping encounter in Kingsmarch, regardless if the atlas runner has risk or not. The boss will sometimes mark the ground with many small-red-circle that continuously follow your character for 10 seconds, dodge them or don’t stand on those circles for too long for it to trigger its effect, avoid theme while killing the boss to complete this challenge.
The Black Knight without being hit by any falling rocks
The Black Knight boss spawn from random encounters in maps, with a starfall crater entrance. Ths boss has 2 phases, at 60% and 20% life, the boss becomes invulnerable for a duration, causing rocks to fall down in the arena in blue-marked areas. To do this challenge you’ll have to avoid all the blue-marked areas to not getting hit by the falling rocks, since the falling rock animation is kinda slow so dodging them should be easy enough, just make sure you character have high enough movement speed or movement skill to dodge around, avoid them for 2 phases only then kill the boss to complete this challenge. Although having high damage character build definitely helps in this challenge, killing the boss as fast as possible so that it doesn’t have time to cast its skills that could fail this challenge.
The Black Knight without being affected by Verisium Laser
The Black Knight boss, randomly spawning from starfall craters in maps, fires a Verisium Laser that deals cold damage and can penetrate 15% cold resistance. This laser can be temporarily blocked by stone pillars before they are destroyed. Avoiding the laser is challenging due to its speed and tracking, making it nearly impossible to dodge once exposed. The most effective strategy is to quickly defeat the boss with a high-damage build before it has a chance to use this attack. Alternatively, you can avoid this phase by logging out as soon as you see the stone pillars spawn and rejoining the map after the laser phase has passed. This logout method requires precise timing; if you're too slow, it won't be effective.
38. Nightmarish Nemeses (Hard)
Complete each of the following Tier 17 Maps while they have at least 250% Item Quantity:
Sanctuary Map(buy) - Nightmare of Lycia
Citadel Map(buy) - Nightmare of Uhtred
Fortress Map(buy) - Nightmare of the Unbreakable
Abomination Map(buy) - Nightmare of the Depraved Trinity
Ziggurat Map(buy) - Nightmare of Catarina
Tier 17 maps in the game are unique compared to regular maps, with specific rules for modification and enhanced content. These maps can only be modified using Chaos Orbs, Vaal Orbs, Delirium Orbs, and Chisels, excluding other types of currency. They also feature a distinct pool of modifiers. The bosses within these maps are "uber" versions of their standard counterparts, meaning they are significantly stronger and feature different movesets. Not only can these uber bosses drop exclusive unique items, but they also drop map fragments necessary for accessing uber pinnacle boss encounters. Additionally, completing Tier 17 maps is now the exclusive method to unlock an extra slot on your map device.
39. Ultimate Usurpers (Hard)
Defeat any four of the following Pinnacle Boss Encounters while the area is level 85:
Sirus, Awakener of Worlds in Eye of the Storm
To access this uber pinnacle boss variant, you’ll need to open 5 pieces of Awakening Fragment(buy) in your map device. These fragments are more likely to be drop from map bosses of any Tier17 maps.
The Uber Elder in The Shaper's Realm
To access this uber pinnacle boss variant, you’ll need to open 5 pieces of Decaying Fragment(buy) in your map device. These fragments are more likely to be drop from map bosses of Tier17 Fortress Map and Tier17 Sanctuary Map.
The Maven in Absence of Mercy and Empathy
To access this uber pinnacle boss variant, you’ll need to open 5 pieces of Reality Fragment(buy) in your map device. These fragments are more likely to be drop from map bosses of Tier17 Abomination Map and Tier17 Ziggurat Map.
The Searing Exarch in Absence of Patience and Wisdom
To access this uber pinnacle boss variant, you’ll need to open 5 pieces of Blazing Fragment(buy) in your map device. These fragments are more likely to be drop from map bosses of Tier17 Abomination Map and Tier17 Sanctuary Map.
The Eater of Worlds in Absence of Symmetry and Harmony
To access this uber pinnacle boss variant, you’ll need to open 5 pieces of Devouring Fragment(buy) in your map device. These fragments are more likely to be drop from map bosses of Tier17 Sanctuary Map and Tier17 Ziggurat Map.
High Templar Venarius in Cortex
To access this uber pinnacle boss variant, you’ll need to open 5 pieces of Synthesising Fragment(buy) in your map device. These fragments are more likely to be drop from map bosses of Tier17 Abomination Map, Tier17 Citadel Map, and Tier17 Ziggurat Map.
The Shaper in The Shaper's Realm
To access this uber pinnacle boss variant, you’ll need to open 5 pieces of Cosmic Fragment(buy) in your map device. These fragments are more likely to be drop from map bosses of Tier17 Fortress Map and Tier17 Citadel Map.
Level 85 pinnacle bosses were the uber variant of them. As part of 3.24 update, they changed ways to access uber pinnacle boss content, which is from allocating atlas passive keystone only, to acquiring map fragments that only drop from Tier17 map, and also changing their loot table becoming more meaningful for farming regular and uber pinnacle bosses.
40. Gear Grinding Goals (Hard)
Complete any 4 of these encounters the specified number of times:
Reach Level 100
Reaching Level 100 in Path of Exile remains a significant grind, despite various methods to boost experience gain such as Infused Beachheads, Pure Breachstones, and the Domain of Timeless Conflict, alongside enhanced XP bonuses from atlas passive trees. Leveling up is notably faster compared to traditional MMOs, but the impact of a single accidental death at higher levels can be severe, as losing 10% of your progress might equate to hours of grinding. If your build isn't optimized for late-game survival, or if you find yourself dying frequently, it may be wise to skip aiming for Level 100. To mitigate experience loss, consider using the Omen of Amelioration item, which reduces XP loss by 75% on death, but it activates only once per map.
Cleanse 300 Darkshrines in the Endgame Labyrinth
The challenge of cleansing 300 Darkshrines in the Endgame Labyrinth is a revamped version of a similar task from the Expedition League, now reduced from 400 to 300. The number of Darkshrines you can access per labyrinth run varies from 2 to 5, depending on the day's layout. This means you'll need approximately 100+ runs to complete the challenge, which is quite manageable depending on your build's speed and your enjoyment of labyrinth content. Note that this challenge specifically requires the endgame version of the labyrinth, accessed with an Offering to the Goddess, and not the empowered version, making it relatively more accessible.
Activate 400 Eldritch Altars or defeat Witnessed Map Bosses
Activating Eldritch Altars - Searing Exarch
You can take ”The Light of Dawn” from atlas passive to increase searing exarch’s altar spawn rate. I would suggest farming searing exarch altars if you want constant profits, and the risky part of farming these altars is there’s modifiers that cause monsters to burning ground of death, and the drop of Meteor when you use a flask.
Activating Eldritch Altars - Eater of Worlds
You can take ”The Shadow of Hunger” from atlas passive to increase eater of world’s altar spawn rate. I would suggest farming eater of worlds altars if you want a chance to gain big profits, and the risky part of farming these altars is the influence monsters are mostly ranged units, can get “machinegun” down by these monsters if they have speed modifier so be careful … and also annoying grasping vine mod when get hit by monster, and lastly ailments you inflict reflect back to you.
Defeat Witnessed Map Bosses
Since the 3.20 update, defeating Maven-witnessed map bosses has become more rewarding with an increased chance of dropping Awakened Gems, including those typically exclusive to Maven. The process involves Maven witnessing different map bosses, and after 10 maps, using Maven’s Invitation: The Atlas to reset and repeat the witnessing. To enhance gem drop chances, allocate the “Destructive Play” keystone in the atlas passives, which makes Maven summon more bosses. For a more efficient challenge completion, focus on maps with multiple bosses, utilizing the “Area contains two Unique Bosses” modifier, as each boss kill counts towards the challenge, not just map completions.
Defeat 250 Level 83 or higher Rare monsters with at least 4 modifiers’
Oh, is that rare monsters challenge again from affliction league which is a “freebies” challenge completion, with a decreasing number too! From 300(old) to now 250, and a requirement of Tier16+ map monster only which is still fine, thanks GGG! There’s few ways to speed up this challenge completion: Craft the map with higher monster pack size; Craft the map with “#% increased number of Rare Monsters” modifier(buy); If your build can handle Tier17 maps, try do Tier17 map with “Rare Monsters each have # additional Modifier“ modifier(buy), this is because only Tier17 maps can have this modifier; Open map with Horned Scarab of Nemeses.
Complete Tier 17 maps x 50
To complete the challenge of finishing 50 Tier 17 maps, players must tackle maps like Sanctuary, Citadel, Fortress, Abomination, and Ziggurat, each hosting an "uber" version of a standard boss with unique movesets and stronger abilities. These maps are special as they can only be modified using Chaos Orbs, Vaal Orbs, Delirium Orbs, and Chisels, and contain exclusive modifiers and rewards, including unique items and map fragments needed for uber pinnacle boss encounters. Successfully completing these maps is also the only way to unlock an additional slot on your map device.
Claim rewards from 200 Rare, Tier 14 or higher Maps successfully completed by your Atlas Runners
Your mapping station in Kingsmarch has to be at least level 6 to be able to run red maps by your atlas runner workers. Do be warned that your atlas runners will run a risk of dying the harder the map is, so the suggested thing to do is to give them rare Tier14 maps with only 2 modifiers(by only transmuting and regaling your map), as that gives your atlas runners the lowest chance of dying and increases the chance of them fully completing the maps.
Stay tuned for a full list of Path of Exile 3.25 challenges, which will be updated here soon!